Are you looking for an easy way to capture screenshots on your Chromebook? The snipping tool on a Chromebook is a powerful feature that allows you to take precise screenshots for work, education, or personal use. Whether you're a student, professional, or casual user, mastering this tool can significantly enhance your productivity. In this article, we’ll explore everything you need to know about using the snipping tool on a Chromebook, including step-by-step instructions, tips, and tricks to make the most of this functionality.
Chromebooks are known for their simplicity, affordability, and efficiency. One of the standout features of Chrome OS is its built-in tools, including the snipping tool. This tool eliminates the need for third-party applications, making it easier than ever to capture and share screenshots. By the end of this article, you’ll have a clear understanding of how to use the snipping tool effectively and efficiently.
Understanding how to use the snipping tool on a Chromebook is essential for anyone who relies on visual communication. Whether you’re creating tutorials, documenting processes, or sharing information with colleagues, this guide will equip you with the knowledge you need to succeed. Let’s dive into the details and unlock the full potential of your Chromebook.
Read also:When Do Dan And Serena Get Back Together In Season 1 A Complete Guide
Table of Contents
- Introduction to the Snipping Tool on a Chromebook
- How to Access the Snipping Tool
- Step-by-Step Guide to Taking Screenshots
- Advanced Features of the Snipping Tool
- Customizing Screenshot Settings
- Saving and Sharing Screenshots
- Troubleshooting Common Issues
- Alternatives to the Snipping Tool
- Tips and Best Practices
- Conclusion
Introduction to the Snipping Tool on a Chromebook
The snipping tool on a Chromebook is a built-in feature that allows users to capture screenshots in various formats. Unlike traditional methods of taking screenshots, the snipping tool provides more flexibility and precision. You can capture the entire screen, a specific window, or a custom area, depending on your needs.
This tool is particularly useful for tasks such as creating presentations, documenting workflows, or sharing information with others. With the increasing reliance on digital communication, the ability to capture and share screenshots has become a critical skill. The snipping tool on a Chromebook simplifies this process, making it accessible to users of all skill levels.
In addition to its ease of use, the snipping tool is integrated directly into Chrome OS, ensuring seamless performance. This eliminates the need for third-party applications, reducing clutter and improving system efficiency. Whether you’re a beginner or an advanced user, the snipping tool is a valuable asset for your Chromebook experience.
How to Access the Snipping Tool
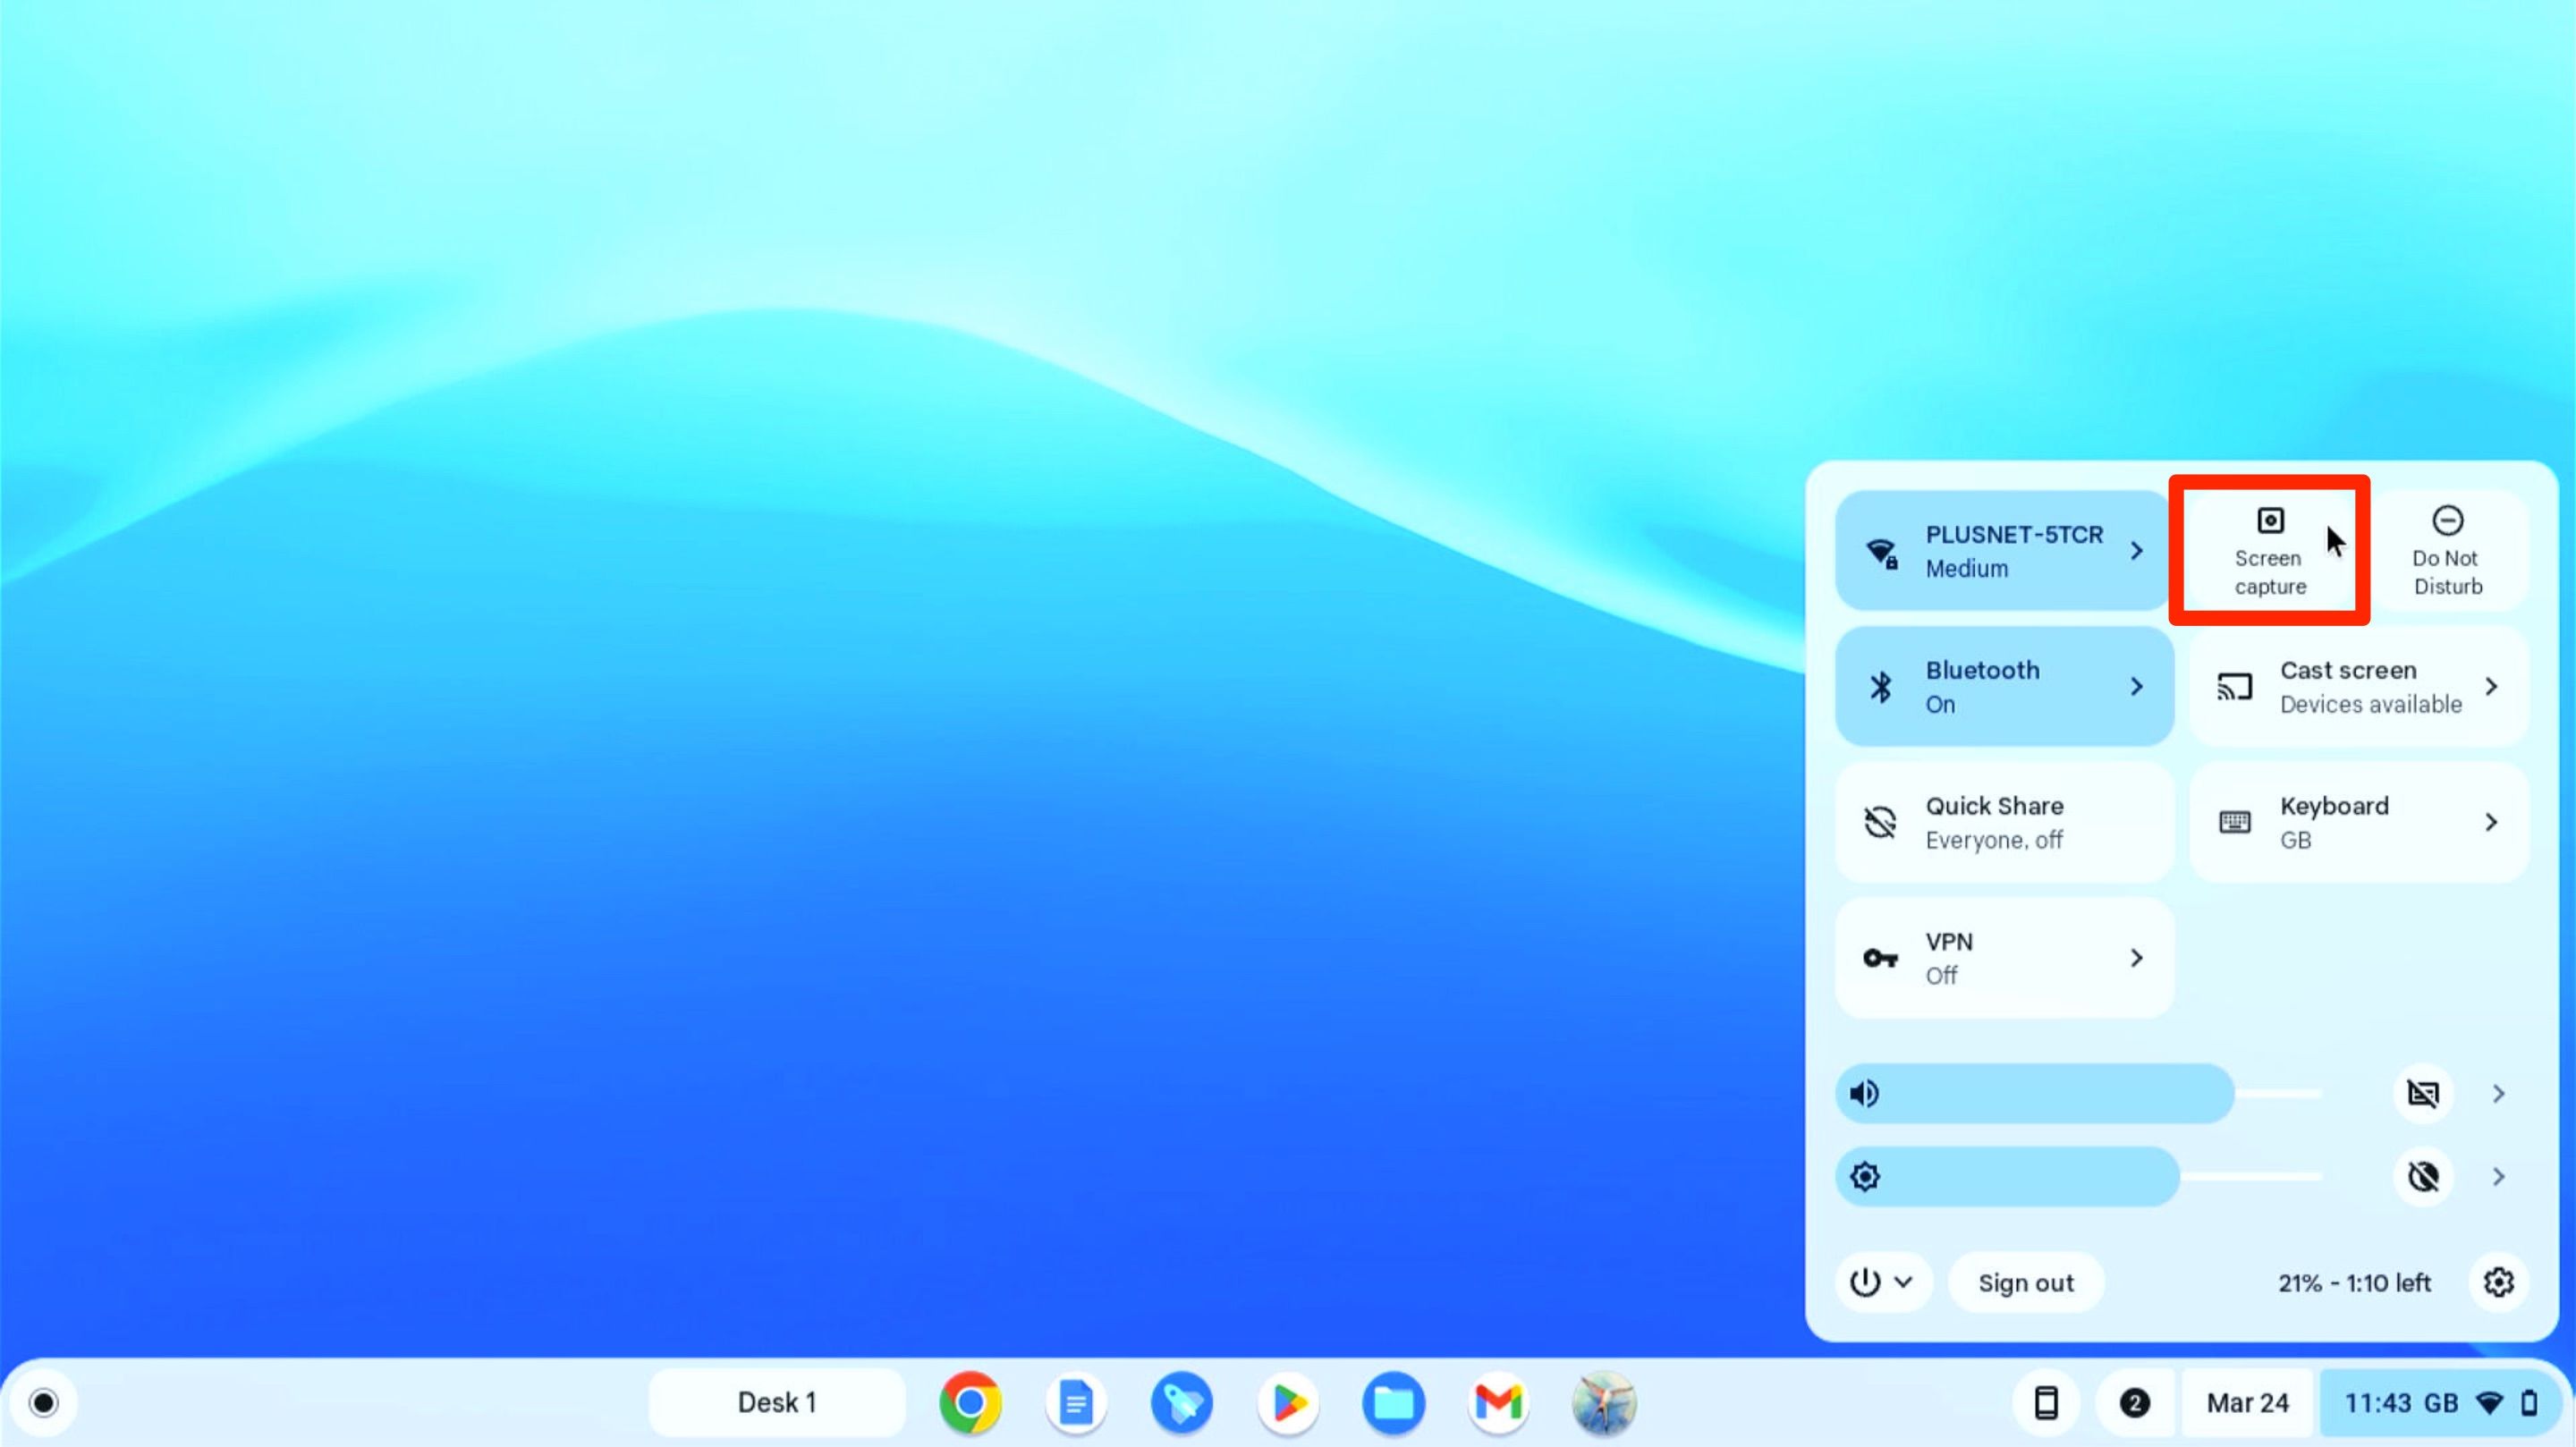
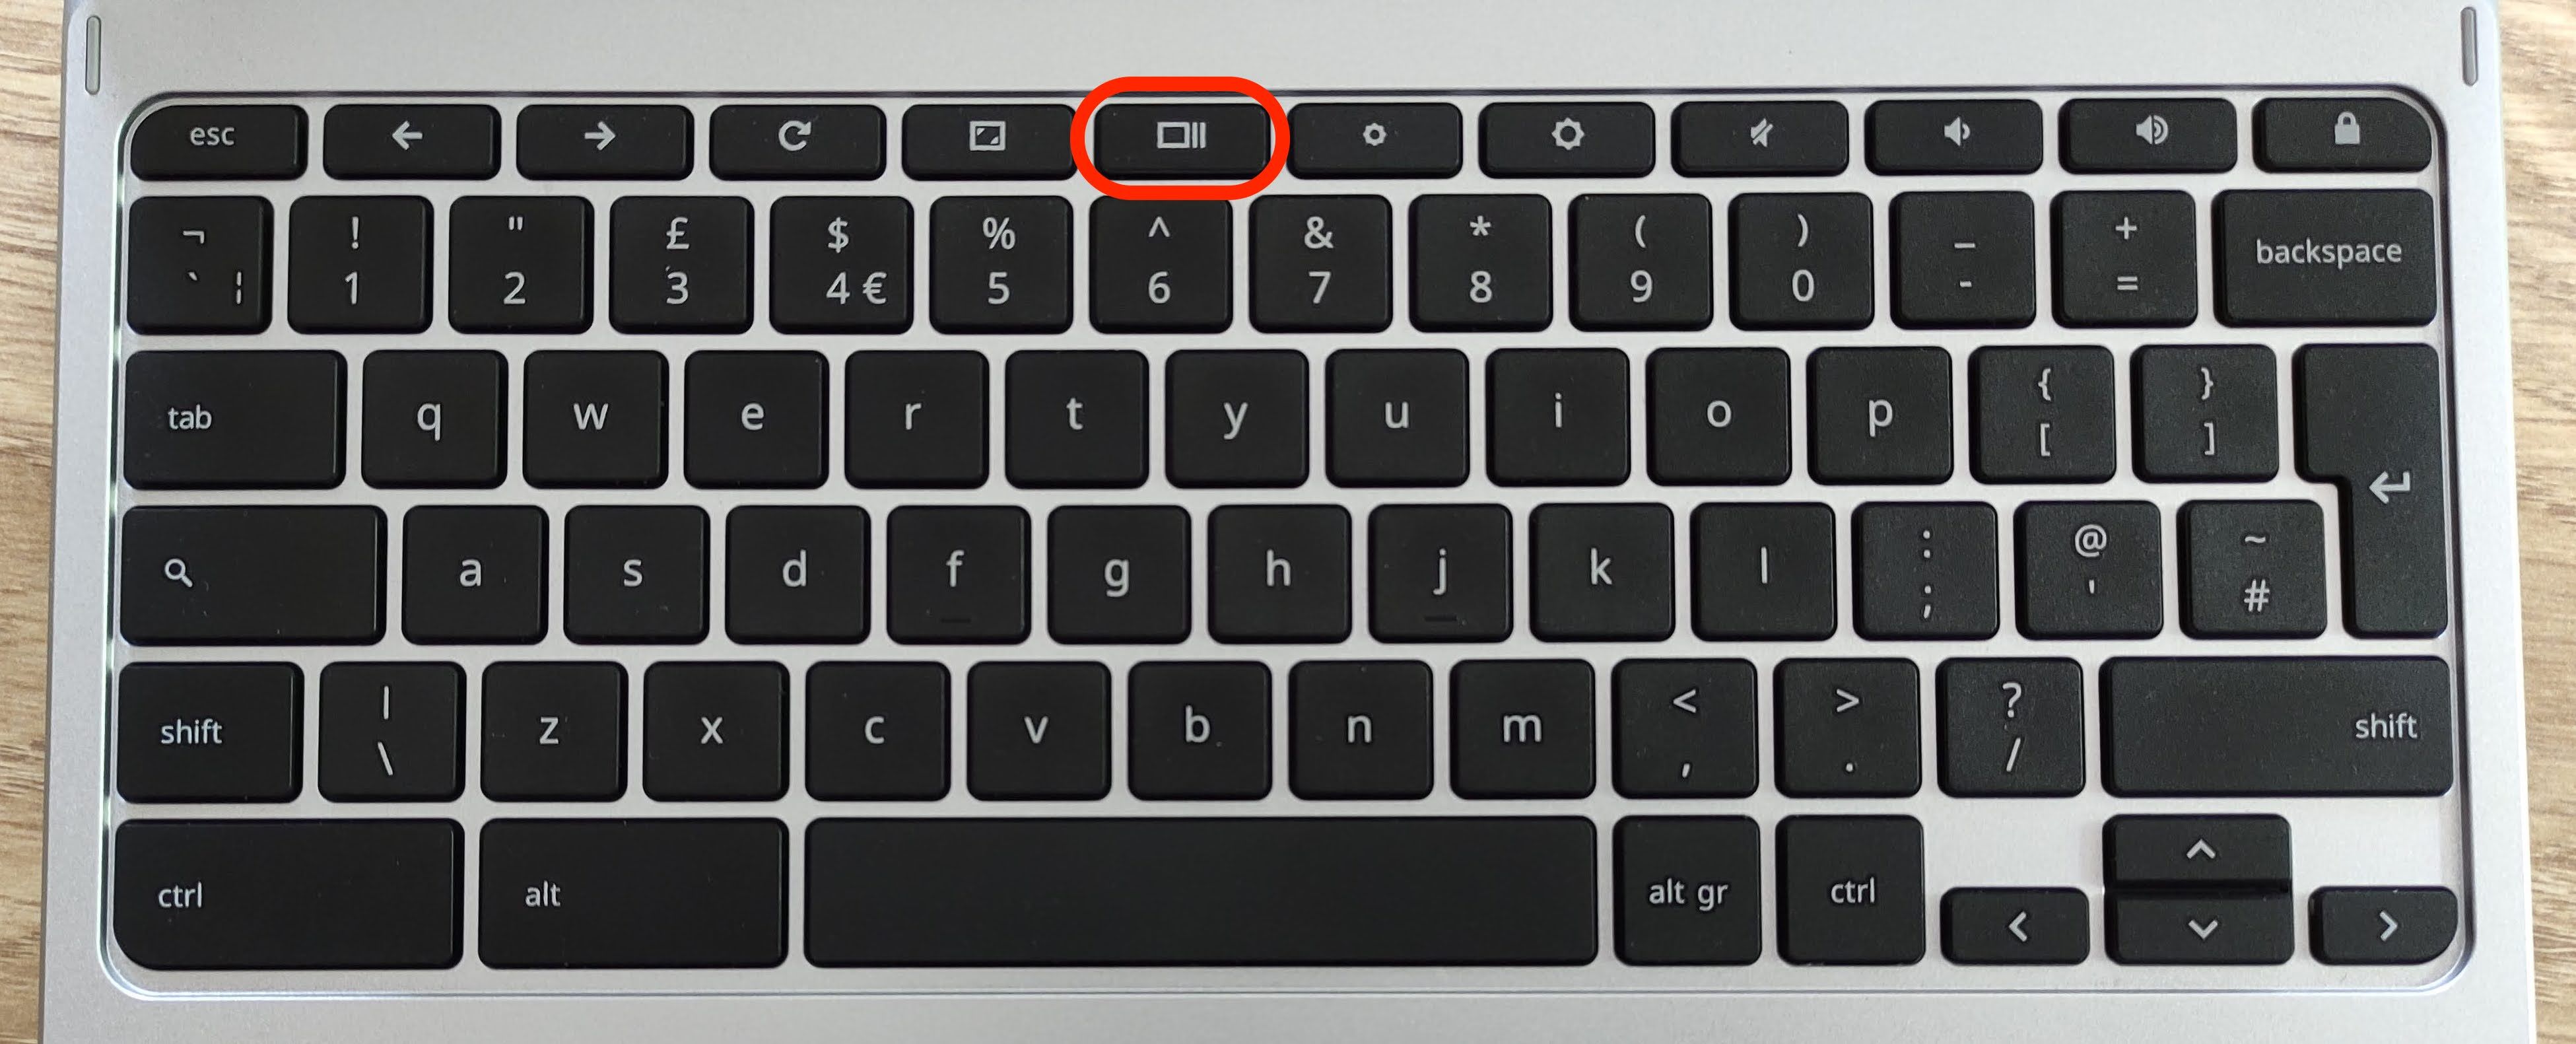
Accessing the snipping tool on a Chromebook is straightforward. To activate the tool, you simply need to press the appropriate keyboard shortcut. The most common shortcut for taking a screenshot is Ctrl + Show Windows (the key with a rectangle and two lines on the side). This will capture the entire screen and save it as a PNG file in your "Downloads" folder.
If you want to capture a specific area of the screen, you can use the shortcut Ctrl + Shift + Show Windows. This will activate the snipping tool, allowing you to select a custom area by clicking and dragging your cursor. Once you release the mouse button, the selected area will be captured and saved automatically.
For users who prefer a more visual approach, the snipping tool can also be accessed through the Chromebook’s settings. Navigate to the "Settings" menu, then select "Device" and "Keyboard." From there, you can customize the keyboard shortcuts to suit your preferences. This flexibility ensures that the snipping tool is accessible to everyone, regardless of their familiarity with keyboard shortcuts.
Read also:Bryton Myler Gf Age Everything You Need To Know About His Relationship And Personal Life
Keyboard Shortcuts for Quick Access
- Ctrl + Show Windows: Capture the entire screen.
- Ctrl + Shift + Show Windows: Capture a custom area of the screen.
- Ctrl + Alt + Show Windows: Capture a specific window.
Step-by-Step Guide to Taking Screenshots
Taking screenshots on a Chromebook is a simple process, but it’s important to follow the correct steps to ensure high-quality results. Here’s a step-by-step guide to help you master the snipping tool:
- Step 1: Prepare Your Screen - Before taking a screenshot, ensure that the content you want to capture is visible and free of distractions.
- Step 2: Choose the Right Shortcut - Decide whether you want to capture the entire screen, a specific window, or a custom area. Use the appropriate keyboard shortcut based on your choice.
- Step 3: Capture the Screenshot - Press the shortcut keys, and the snipping tool will activate. For custom areas, click and drag your cursor to select the desired portion of the screen.
- Step 4: Save the Screenshot - Once the screenshot is captured, it will be saved automatically in your "Downloads" folder. You can also rename or move the file as needed.
By following these steps, you can ensure that your screenshots are clear, accurate, and ready to use. The snipping tool’s intuitive design makes it easy to capture high-quality images without any hassle.
Common Mistakes to Avoid
- Forgetting to adjust the screen before taking a screenshot.
- Using the wrong shortcut for your desired capture type.
- Not checking the saved location of the screenshot file.
Advanced Features of the Snipping Tool
While the basic functionality of the snipping tool is impressive, Chrome OS also offers several advanced features to enhance your screenshot experience. These features are designed to provide greater flexibility and control, allowing you to capture exactly what you need.
One of the most notable advanced features is the ability to annotate screenshots. After capturing an image, you can use built-in tools to add text, shapes, or highlights. This is particularly useful for creating tutorials or providing feedback on documents. To access these tools, simply open the screenshot in the Chromebook’s image editor.
Another advanced feature is the option to delay the screenshot capture. This is ideal for capturing menus or dropdowns that disappear when you press a key. By setting a delay, you can ensure that the desired content remains visible during the capture process. To enable this feature, navigate to the "Settings" menu and adjust the screenshot preferences.
Customizing Annotation Tools
- Use the pen tool to draw freehand annotations.
- Add text boxes for detailed explanations.
- Highlight important areas with the highlighter tool.
Customizing Screenshot Settings
Customizing the settings of the snipping tool can significantly improve your screenshot experience. Chrome OS allows users to tailor the tool to their specific needs, ensuring maximum efficiency and convenience.
To customize the screenshot settings, start by navigating to the "Settings" menu. From there, select "Device" and "Keyboard." You’ll find options to modify the keyboard shortcuts for taking screenshots. For example, you can assign a different shortcut to capture a specific window or custom area.
In addition to keyboard shortcuts, you can also adjust the default save location for screenshots. By default, screenshots are saved in the "Downloads" folder, but you can change this to any folder of your choice. This is particularly useful for organizing your files and keeping your workspace clutter-free.
Additional Customization Options
- Change the file format of screenshots (e.g., PNG, JPEG).
- Enable or disable the screenshot notification sound.
- Set a delay timer for capturing dropdown menus.
Saving and Sharing Screenshots
Once you’ve captured a screenshot, the next step is to save and share it. Chrome OS makes this process seamless, allowing you to store your screenshots in various locations and share them with others effortlessly.
By default, screenshots are saved in the "Downloads" folder in PNG format. You can rename the file or move it to a different folder for better organization. To share a screenshot, simply right-click on the file and select "Share." This will open a menu where you can choose the desired sharing method, such as email, Google Drive, or social media.
For users who frequently share screenshots, Chrome OS offers integration with cloud services like Google Drive. By saving your screenshots directly to the cloud, you can access them from any device and share them with collaborators in real-time. This feature is particularly useful for remote teams and educational settings.
Tips for Efficient File Management
- Create a dedicated folder for screenshots to keep them organized.
- Use descriptive filenames to make it easier to locate specific screenshots.
- Backup important screenshots to the cloud for added security.
Troubleshooting Common Issues
While the snipping tool on a Chromebook is generally reliable, users may occasionally encounter issues. Understanding how to troubleshoot these problems can help you resolve them quickly and continue using the tool effectively.
One common issue is the screenshot not saving properly. This can happen if the "Downloads" folder is full or if there’s a problem with the file system. To resolve this, try clearing some space in the folder or restarting your Chromebook. If the issue persists, consider running a system diagnostic to identify any underlying problems.
Another issue is the keyboard shortcut not working. This can occur if the shortcut has been customized or disabled. To fix this, navigate to the "Settings" menu and reset the keyboard shortcuts to their default settings. You can also test the shortcuts to ensure they’re functioning correctly.
Additional Troubleshooting Tips
- Check for system updates to ensure you’re using the latest version of Chrome OS.
- Restart your Chromebook to refresh the system.
- Contact Chromebook support for assistance with persistent issues.
Alternatives to the Snipping Tool
While the built-in snipping tool on a Chromebook is highly effective, there are also several third-party alternatives available. These tools offer additional features and customization options, making them ideal for users with specific needs.
One popular alternative is the "Awesome Screenshot" extension. This tool allows you to capture screenshots, annotate them, and even record screen activity. It’s available as a Chrome extension and integrates seamlessly with your browser, providing a comprehensive solution for all your screenshot needs.
Another alternative is "Lightshot," a lightweight application that offers advanced editing features. With Lightshot, you can capture screenshots, edit them with various tools, and share them directly from the app. This makes it a convenient option for users who require more functionality than the built-in snipping tool provides.
Comparison of Alternatives
- Awesome Screenshot: Ideal for browser-based tasks and annotations.
- Lightshot: Offers advanced editing and sharing features.
- Snagit: Provides professional-grade tools for capturing and editing screenshots.
Tips and Best Practices
To make the most of the snipping tool on a Chromebook, it’s important to follow best practices. These tips will help you capture high-quality screenshots and use them effectively in various contexts.
First, always ensure that your screen is clean and free of distractions before taking a screenshot. This will result in a clearer image and make it easier to focus on the content you want to capture. Additionally, consider using the annotation tools to add context or highlight important information.
Second, organize your screenshots systematically by creating dedicated folders and using descriptive filenames. This will make it easier to locate specific screenshots when you need them. You can also use cloud storage to back up important files and access them from any device.
Best Practices for Sharing Screenshots
- Compress large